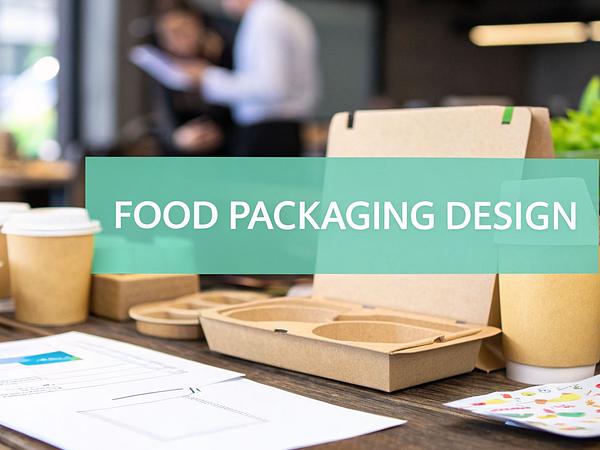
Branded greaseproof paper is no longer just for high-end restaurants. From street food stalls to local bakeries, UK food businesses are discovering its power to elevate their brand. It's a simple, cost-effective way to make your products look more professional and memorable. But how do you get your logo and design onto this specialist material?
This guide walks you through everything you need to know about printing on greaseproof paper, from choosing the right method to preparing your artwork and understanding the costs involved.
Understanding Your Canvas: The Basics of Greaseproof Paper
Before you think about putting a logo on it, it's vital to understand the paper itself. It’s not just any paper; it’s a specialist material designed for a specific job in the food service industry. Getting the print right means understanding its unique properties.
So, what exactly is it? At its core, greaseproof paper is made by refining paper pulp to a point where the fibres become incredibly dense. This process creates a sheet with very low porosity, which naturally resists grease and oil from seeping through.
This natural resistance is a huge advantage for food presentation. It means your branding stays crisp and clean, and your customers don't end up with oily fingers. It’s the perfect wrap for everything from sausage rolls and artisan sandwiches to portions of chips.
Why Its Properties Matter for Printing
The very quality that makes greaseproof paper work—its resistance to grease—also makes it a bit tricky to print on. Standard inks are designed to be absorbed by porous paper fibres, but greaseproof paper fights absorption.
Here’s what you need to keep in mind:
- Ink Adhesion: The ink needs to dry on top of the paper's surface rather than soaking into it. This requires specialised, food-safe inks and specific printing methods to ensure the design cures properly and doesn't smudge or transfer onto food or hands.
- Heat Sensitivity: The paper’s barrier properties can be affected by high temperatures. Certain printing or drying processes that involve too much heat could compromise its grease-resistant qualities.
- Food Safety: This is non-negotiable. Everything that touches the paper, from the raw material to the ink and any coatings, must be certified as food-safe under UK and EU regulations. We're talking about direct contact with burgers, pastries, and cakes, so there's no room for error.
Key Takeaway: Think of greaseproof paper as a non-porous canvas. Your printing partner needs to use the right paints (inks) and techniques to make the art stick without ruining the canvas itself. This ensures your packaging is not only beautiful but also functional and safe.
Choosing the Right Printing Method for Your Greaseproof Paper
So, you’ve decided to brand your greaseproof paper. Smart move. It's one of the most effective ways to build brand recognition, making your entire product range—from takeaway food containers to napkins—look cohesive. Now for the technical part: how do you get your design from a screen onto the paper that wraps your food?
For most UK food businesses, the choice really boils down to two main technologies: flexographic and digital printing. Each has its own place, and the best one for you depends entirely on your order size, design complexity, and budget.
Let's break them down.
Flexographic Printing: The Industry Workhorse
Think of flexographic (or 'flexo') printing as the traditional, high-volume powerhouse. It's the go-to method for larger businesses ordering in bulk. It uses flexible printing plates wrapped around rotating cylinders, a bit like a very sophisticated, high-speed rubber stamp.
This method is incredibly efficient for large runs. Once the plates are made and the press is running, it can print thousands of metres of paper at a very low cost per sheet.
The main things to know about flexo are:
* Best for: Large orders, typically 10,000 sheets or more.
* Design: Works best with simple designs and a limited number of colours (usually 1-4 spot colours). Complex, photo-realistic images aren't its strong suit.
* Cost: There's an initial setup cost for the printing plates, which makes small runs expensive. But for big orders, the per-unit price is unbeatable. This makes it a great long-term investment.
This is the method you'll see used by larger chains and established businesses that need consistent branding across thousands of items.
Digital Printing: The Flexible Newcomer
Digital printing is the modern alternative. It works much like an office inkjet or laser printer, but on an industrial scale, applying ink directly onto the greaseproof paper without the need for plates.
The beauty of digital is its flexibility. It's perfect for startups, seasonal promotions, or anyone wanting to test a new design without committing to a massive order. You can print full-colour, photographic-quality images with ease.
Here’s where digital really shines:
* Best for: Small to medium-sized orders, from as few as 1,000 sheets.
* Design: Excellent for intricate, multi-coloured, or even photographic designs. There are virtually no limits on colour.
* Cost: No plate setup fees, which makes it cost-effective for smaller quantities. The price per sheet is higher than flexo, but you avoid that initial investment.
We see a lot of independent cafés, street food vendors, and pop-ups choosing digital to get started with custom branded greaseproof paper.
Flexographic vs Digital Printing at a Glance
To make the choice clearer, here’s a straightforward comparison of the two main methods for your business.
| Feature | Flexographic Printing | Digital Printing |
|---|---|---|
| Best for Quantity | Large runs (10,000+ sheets) | Small to medium runs (1,000+ sheets) |
| Colour & Complexity | Best for 1-4 solid spot colours | Excellent for full-colour, complex images |
| Cost Per Sheet | Very low on large runs | Higher, but consistent across quantities |
| Setup Costs | Requires one-off fee for printing plates | No setup or plate fees |
| Turnaround Time | Longer due to plate production | Faster, especially for repeat orders |
| Food Safety | Standard, uses certified food-safe inks | Standard, uses certified food-safe inks |
Ultimately, your order volume is the biggest factor. If you’re just starting out or running a limited-time offer, digital is your friend. If you’re ordering for the long haul and have a simple logo, flexo will save you money.

A Quick Word on Inks and Food Safety
This is non-negotiable. Whichever printing method you choose, you absolutely must ensure your supplier uses food-safe, vegetable-based or water-based inks. These are specially formulated to be non-toxic and compliant with UK and EU food contact regulations.
Never, ever be tempted to use a standard commercial printer for your food wraps. They won't have the right paper, the right machinery, or, most importantly, the certified food-safe inks. It’s a health risk and simply not worth the reputational damage. Always ask your supplier for their food safety certification.
Step 3: Getting Your Artwork and Pre-Press Ready
Getting your design from a screen onto greaseproof paper isn't quite a simple 'drag and drop'. There are a few crucial pre-press steps to get right, and this is where many businesses stumble. Think of it as laying the groundwork for a flawless print run.
Getting this stage right saves you time, money, and a whole lot of headaches down the line. A common mistake is submitting artwork that isn't properly set up for the specific printing method, which can lead to delays or, worse, a final product that doesn't look anything like you imagined.
Artwork Specifications for Flawless Printing
Your printer will give you their exact specifications, but they almost always centre on these key areas:
File Format: Stick to vector files whenever possible. Formats like Adobe Illustrator (.ai), .eps, or press-ready PDFs are the industry standard. Unlike pixel-based files (like .jpg or .png), vectors can be scaled to any size without losing quality, ensuring your logo looks crisp and sharp.
Colour Mode: Your artwork must be set to CMYK (Cyan, Magenta, Yellow, Key/Black), not RGB (Red, Green, Blue). Screens use RGB, but printing presses use CMYK. If you submit an RGB file, the colours will shift during conversion, and that vibrant red you approved on screen might come out looking disappointingly muddy.
Pantone (PMS) Colours: For perfect colour consistency, especially for your core brand colours, specifying Pantone Matching System (PMS) colours is the way to go. This system uses pre-mixed inks to ensure your exact shade of blue, for example, is identical across every single sheet, every single time. It's the gold standard for brand consistency in your food packaging.
Resolution and Fonts: If your design includes any photographic or raster elements, they need to be at least 300 DPI (dots per inch) at their final print size. Anything less will look pixelated. And don't forget to outline all fonts or embed them in the PDF. This turns the text into a shape, so the printer doesn’t need to have your specific font installed, preventing any unexpected substitutions.
The Proofing Process: Your Final Check
Once you've submitted your artwork, you'll get a 'proof' back. This is your last chance to catch any errors before the presses start rolling.
The proof is typically a digital PDF showing how your design will be laid out on the paper, including cut lines and any print-free zones. Check it meticulously.
Expert Tip: Don't just glance at it on your phone. Open the proof on a proper computer screen. Check every single letter for typos, confirm the logo placement, and double-check that the colours are listed correctly (e.g., your specific PMS code). Getting a colleague to give it a second look is always a good idea. Once you sign off on that proof, any errors are your responsibility.
Common Printing Problems and How to Solve Them
Even with the best planning, printing on a specialist material like greaseproof paper can sometimes throw a curveball. Don't panic. Most issues are common and easily fixed, especially when you know what to look for. Here’s a rundown of problems we see from time to time and how to get them sorted.
Ink Smearing or Rubbing Off
This is probably the most frequent hiccup. You get your beautiful branded paper, wrap a warm bacon butty in it, and the customer ends up with ink on their hands. It’s a bad look for your business.
This usually happens for a couple of key reasons:
- Incorrect Ink Curing: The inks, especially on a non-absorbent surface like greaseproof, need to be fully dried or 'cured'. If the process is rushed or the equipment isn't set correctly, the ink won't bond to the paper and will easily smudge.
- Wrong Ink Type: Using a standard ink not formulated for coated or grease-resistant substrates is a recipe for disaster. The ink simply sits on the surface without adhering properly.
What to do: Always insist on seeing a physical sample from your printer. Test it yourself – rub it, wrap something warm and slightly moist in it, and see what happens. If it fails, the printer needs to adjust their curing process or confirm they are using the correct food-safe, low-migration inks for the job.
Colours Look Washed Out or Inaccurate
You spent ages perfecting your brand’s signature colour, but on the finished paper, it looks dull or just plain wrong.
Greaseproof paper isn't brilliant white like office paper; it has its own natural, slightly off-white or translucent character. This base colour will inevitably affect how the final ink colours appear. A vibrant yellow, for example, might look a bit more muted.
Expert Tip: For critical brand colours, always specify Pantone (PMS) references rather than just CMYK values. This gives your printer a physical colour target to match. Even then, ask for a printed proof on the actual paper stock you'll be using. This is the only way to be 100% sure of the final result before committing to a large order.
Grease Bleeding Through the Ink
You've got your printed sheets, and they look fantastic. But the moment they come into contact with a greasy croissant or a portion of chips, an oily "halo" appears around your logo, and the paper seems to lose its grease-resistant properties in that area.
This is a classic sign that the ink has compromised the paper's barrier. Some inks can break down the coating that makes the paper grease-resistant. This is why choosing a supplier who specialises in food packaging is so critical. They’ll use inks and, if necessary, an overprint varnish (OPV) that work in harmony with the paper to maintain its integrity.

A Note on Sustainability and Food Safety
Beyond the aesthetics, a key consideration for any modern food business is compliance and eco-consciousness. Is the paper really food-safe? And can it be recycled or composted?
Don't just take a supplier's word for it. Ask for the paperwork.
- Food-Safe Certification: Your printer should be able to provide documentation proving their inks and paper comply with UK and EU food contact materials regulations (e.g., EC 1935/2004).
- Eco-Properties: Many greaseproof papers are naturally biodegradable and compostable. If you've been promised compostable or FSC-certified paper, ask to see the relevant certifications. Choosing sustainably sourced paper is a small change that tells your customers you care. Reputable suppliers will have these readily available. For a deeper dive, check out our guide to eco-friendly packaging choices.
Getting these details right isn't just about avoiding problems; it's about protecting your customers, your brand's reputation, and making a responsible choice for the environment.